Wednesday, September 25, 2013

Jambalaya

 
This week we explore a spicier dish!  Wikipedia tells me there are two general styles of Jambalaya.  The way I make it is closer to the Creole style (because of my use of tomatoes).  For this one, my dad was cooking with me, which is always awesome!

My ingredient list this week was:
  • Boneless chicken thighs (I used about 2 1/2 lbs)
  • Kielbasa (about 1/2 lb)
  • 1 Sweet Onion
  • Celery (about 4 stalks)
  • 1 Green Bell Pepper
  • 3 Anaheim Peppers
  • 28 oz can of Whole Peeled Tomatoes
  • 1 Head of Garlic (I got one from a farmer's market, and it had four huge cloves)
  • Butter
  • 1 1/2 cups uncooked rice (I used medium-grain white)
  • Spices:
    • 2 Tsp Cayenne
    • 1 1/2 Tsp Salt
    • 2 Tsp Thyme
    • 1 Tbsp Black Pepper
    • 1/2 Tsp Sage
    • 1 Tbsp Paprika
    • 1/2 Tsp Ground Mustard
    • 1 Tbsp Garlic Powder
    • 1 Tsp Oregano
First, preheat the oven to 350 degrees Fahrenheit .

Now it is time for the prep work.  Chop up your celery, onion, and peppers.  This combination is referred to as "the trinity".  This also usually doesn't consist of Anaheim peppers, but I was using what I had growing in my garden (which is also why my 'green' bell pepper is somewhere between green and red).


Cut up your kielbasa and chicken (we cut the chicken into thirds).  Separate the tomato juice from the canned tomatoes into a bowl.  Cut the tomatoes in the can, and you should be able to separate more of the juice after.  Set the bowl aside, this will be used later.

Also, mince your garlic.  I used a whole head of garlic, which consisted of four huge cloves.  My father brought this back from the farmer's market in Peekskill, NY, which is where he sells his cheese.  I don't know what the variety is.  Whatever it was, it was delicious!


Now is also a good time to mix all of the spices together.

Once all the prep work is done, it is time to start cooking everything!  Heat your pan to medium-high heat, and add about 2 Tbsp butter to the pan.  Once melted, brown the kielbasa.


When browned, add the chicken thighs.  After the chicken has also started to brown (no more pink on the outside), add the spice mix and half of each of the trinity (onion, peppers, and celery).  Then stir like crazy until the vegetables simmer down.  This could take about 5-8 minutes depending on how hot the stove is.


 When it gets close to being simmered down add the garlic, then tomatoes, and finally the rice.  Once the rice is added, take off the heat and add the liquids (measure how much tomato juice you have, and top it off with water until the total quantity is 2 1/2 cups).  Then add the rest of the trinity and put the whole pot into the oven.


Next is a very important step.  Grab a beer (or drink of choice or legality) and play Skyrim while the timer is set for 45 minutes.

After 45 minutes, add 1/2 cup of water, and put back in the oven for another 15 minutes.  Once the time is up, take it out of the oven, stir thoroughly, and taste to see if the rice is fully cooked.  If the rice is to your liking, let it sit for 5 minutes and serve!  This is a great meal for colder days, especially with it being both warm and spicy.


Wednesday, September 18, 2013

Chicken Sausage in a White Wine Sauce


This week's recipe is less cheesy than last week's, but don't worry, there is still plenty of garlic.  For this I used chicken sausage instead of pork for something lighter and different than what I normally use.  Also since I used only a few olives in the dinner, many of the others were sacrificed as a snack during the cooking process.  Man, they had such a nice burn, I love a good, adventurous snack!

My ingredient list for this recipe is:
  • Chicken Sausage (I used Al Fresco's Roasted Garlic)
  • Whole Wheat Angel Hair Pasta
  • Garlic (four cloves)
  • Olive Oil
  • 2 Tbsp Butter
  • Vermouth
  • Three Tomatoes (medium)
  • Olives (I used olives from this mix from Pickle Licious)
  • Mustard (brown)
  • Cayenne

Before you start anything else, heat water for the pasta.  Put a lid on it to help bring it to a boil faster.


Meanwhile, cut and mince the other ingredients.  Mince the garlic (I roughly minced it, so there would be some bigger pieces in this).  For my recipe, I picked out six kalamata olives from the mix I had.  Because the mix I had was spiced, this added flavor to the dish.  If you are not using olives that are already spicy, you might like to add a little extra cayenne at the end.  Also, cut up the chicken sausage, and dice the tomatoes.

Next we cook the sausage.  Heat your skillet with a bit of olive oil on medium-high heat.  The sausage I used was already fully cooked, so I just fried it until it was lightly brown.  When it does brown lightly, take it off the heat, and transfer back to a plate with a paper towel to absorb some of the grease and oil.  Place another paper towel on top for the same purpose, and set aside.


Turn the burner to low, and return the skillet to it.  Cut the butter into two or more pieces and let melt on the warm pan.  Once melted, add the minced garlic.  Cook the garlic in the butter for a few minutes, but do not let it brown.

Next, add the vermouth, adding enough to cover the bottom of the pan (about 1/8th inch deep).  Use this as an opportunity to scrape up anything browned at the bottom of the pan, which will add flavor to the sauce (and make your pan easier to clean after).  Bring the heat back up to about medium heat, and simmer until the alcohol is burned off (you can either tell by the smell or the taste if the alcohol has been boiled off).


If the water is boiling, around now is a good time to cook the pasta.  I used about 3/4ths of a pound of whole wheat angel hair pasta.


Add the minced olives to the sauce mix, and a squirt of mustard.  You'll need to do the mustard to taste, but make sure you don't add too much.  Finally add a little bit of cayenne.  Once the taste is to your liking, stir in the diced tomatoes.  Turn the heat down to low, add the sausage, and simmer for a few minutes.


Take the pan off the heat, and it is ready to serve!  What I made here served my family of three (if you are wondering how much it made).  It was especially great when paired with an episode of Doctor Who!

Wednesday, September 11, 2013

Jersey Girl Panini


For my first blog post, I wanted to make something to congratulate Cooperstown Cheese Company with their cheese Jersey Girl placing 3rd in American Originals at the American Cheese Society Convention. What better way than making a grilled cheese/panini? Of the cheese they make, Jersey Girl is one of my all time favorites.  Jersey Girl is a raw milk Colby that is made from the milk of Jersey cows (hence the name Jersey Girl).  On top of its recent award, it was also one of the two cheeses from Cooperstown Cheese Company that were on the 2013 Inauguration menu (the other being Toma Celena).


For this sandwich, my ingredient list is:
  • Jersey Girl (Cooperstown Cheese Company), thinly sliced
  • Loaf of Ciabatta (Balthazar Bakery)
  • 1 Roasted Red Pepper
  • Cremini mushrooms
  • Garlic (I used about 4 cloves and minced them)
  • Lemon Juice
  • Oregano
  • Black Pepper

First, roast the red pepper. It's perfectly fine to buy a jar of roasted red peppers, but I find it isn't too hard to roast the pepper myself, and it's quite a bit cheaper. Get rid of the stem and seeds, and put it in the broiler while keeping an eye on it.

When one side starts to blacken, use tongs to rotate it until all of the sides seem cooked enough. For this meal, I pealed off the skin when I was done roasting it. After roasting, cut the pepper into strips.


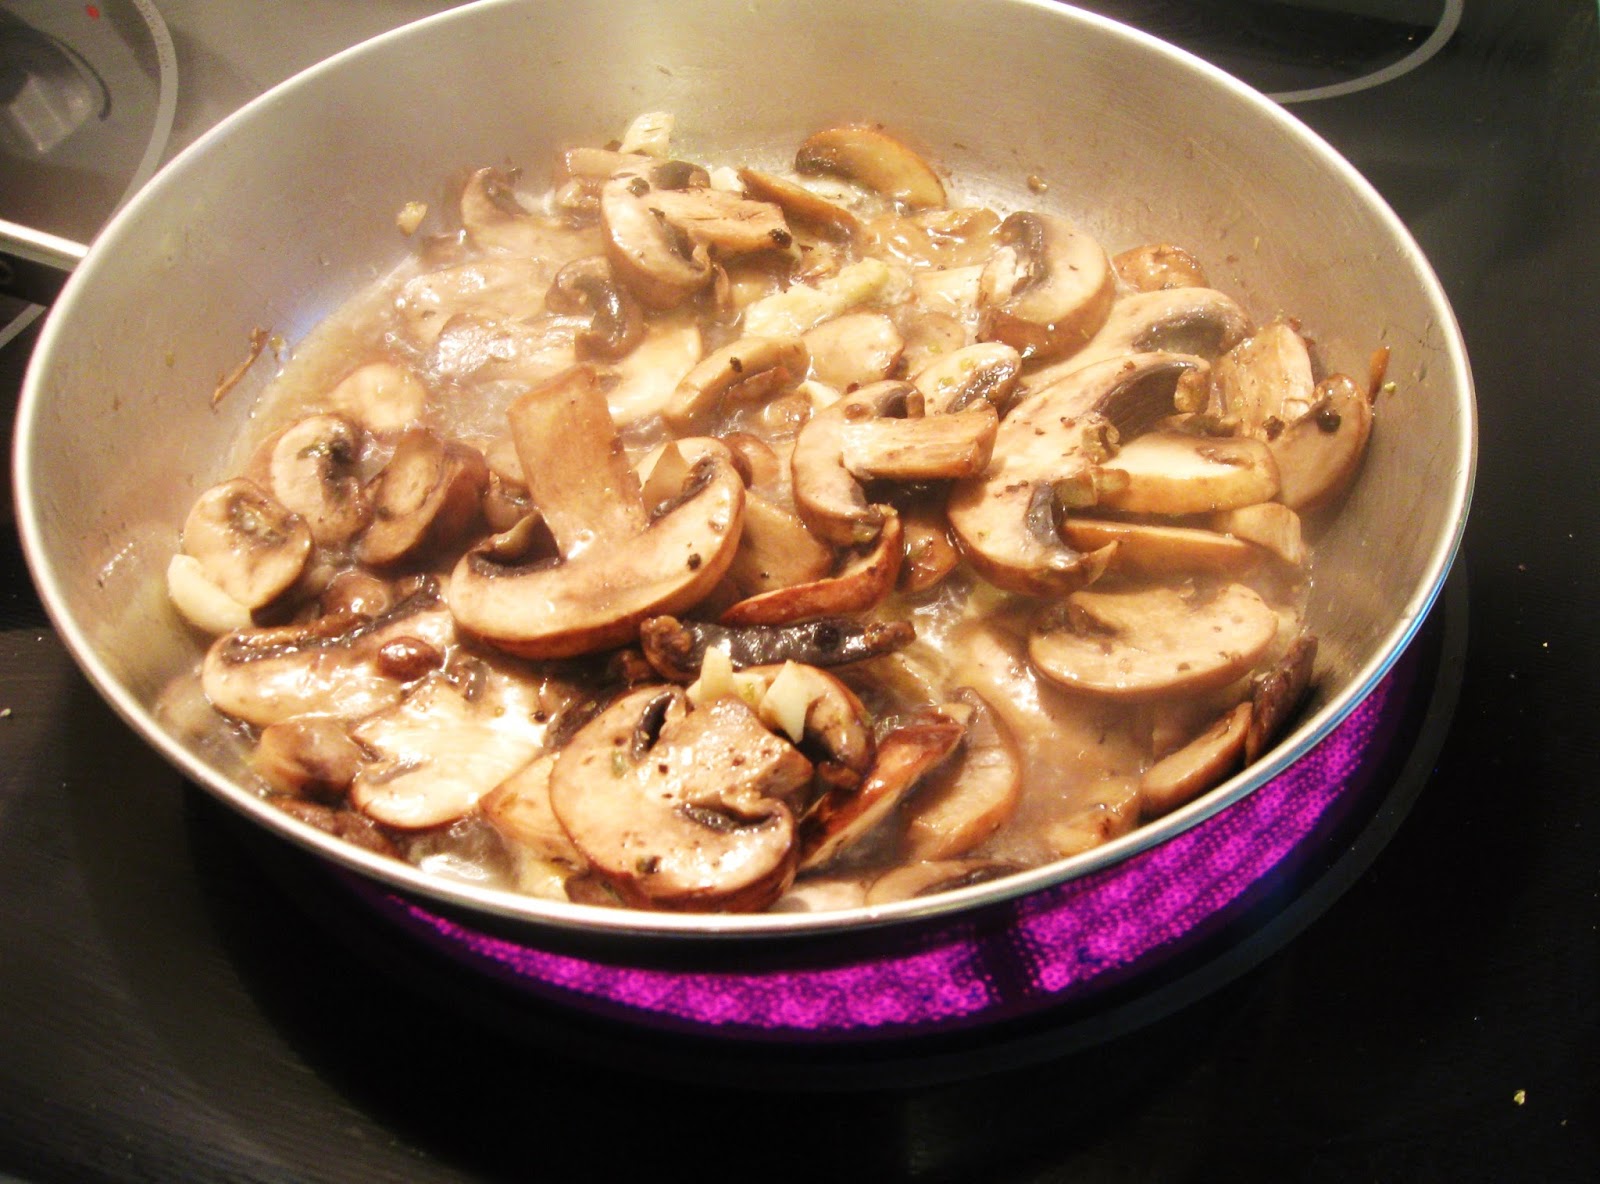
Next, saute the mushrooms. I tend to like creminis a lot and I thought they would be a good pick for this meal. Keep the pan at medium heat with olive oil when sauteeing the mushrooms until they seem partly cooked.

Add minced garlic (I used four cloves because I always like a lot of garlic, and for this it seemed to be a good amount) to cook with the mushrooms, and add black pepper and oregano. When the mushrooms seem more fully cooked, sprinkle lemon juice over the top (not too much). When the mushrooms are cooked enough, take them off of the heat and use a slotted spoon to transfer them (and garlic) into a bowl and drain the liquid.


Now that the pepper and mushrooms are cooked, it is time to assemble the sandwich. Slice the ciabatta loaf lengthwise, grill the whole loaf, then slice it after it's done. Generally, my first layer is sliced Jersey Girl, and on top of that I like to put down a layer of the roasted red peppers, followed by the mushrooms and garlic.


One of the saddest things that can happen to a family of cheese-makers is for the panini press to stop working...which it did about two months ago. If you're like me and don't own a working panini press, this step is where we're going to get a little bit creative.  Because of the volume of the ciabatta bread, I generally like to press it, and make sure that the cheese on the inside is getting melted.  What I end up using is another pot and to press down my sandwich (which stirs up quite a few chuckles from my parents watching me from the other side of the kitchen).

When the cheese is melted and both sides of the bread are toasted, it's done!  After taking the whole thing out of the pan, cut it into six slices to serve (as you can see from the first image of this post).


So there we have it, my first addition to this blog!  Cooperstown Cheese Company's Jersey Girl melted wonderfully for this panini, and I highly recommend it for any variety of panini or grilled cheese sandwiches you may wish to make.

Tuesday, September 10, 2013

Welcome! Let's enjoy garlic together!

Hello! How are you? I'm doing well, thanks for asking! Do you like garlic? What a coincidence, so do I! Come join me on this journey of mine. This is a journey of finding all the wonderful things we can make with garlic, as well as a journey for myself in the world of blogging. So pack your bags, we're going on a culinary adventure!

Who am I?
You may be asking yourself, “Who is this strange girl with the garlic obsession?” Well friends, my name is Katie Sweitzer, the 21 year old cheese-maker's daughter that will eternally be mistaken for 15. I recently graduated from Cornell University with a degree in Biological Sciences (focused in genetics and microbiology), and while I love immersing myself in science, I love to cook as well. I may not be an expert chef, but I have enjoyed the process of learning and expanding what knowledge I do have. I have received various food-related nicknames throughout my years at college, such as “muffin” or “garlic” Katie (well...and “gumbo girl”, but that's a whole 'nother story).

As I mentioned above, I am a cheese-maker's daughter. Back in 2007, my father started his own tasty adventure in the cheese-making industry. If you are reading this now and have never tried any of the cheeses from Cooperstown Cheese Company, I highly recommend you go find out where to get yourself some and try it. I may be biased, but I think the awards on two of our cheeses say more than I ever could. In 2009, Toma Celena won 2nd place in European-style cheeses, while this year Jersey Girl won 3rd place in American-style originals at the American Cheese Society Convention. As a congrats to Jersey Girl, it will be featured in the first dish I make!

Why Garlic?
So, why garlic? Well, why not garlic? I've always loved garlic! It adds a great flavor to a huge variety of dishes, and is even wonderful if you roast whole cloves to eat. Also within the past year, I've been able to explore different varieties that people sell at farmer's markets (so far, I think “Red German” that is my favorite). At my best, I go through a head of it every two weeks. Also garlic is good for you, including reducing blood pressure and having some cancer-protective properties. Here are a few sources where you can read up on why garlic is good for you:
My Goal for this Blog
I have wanted to become a blogger for a while. This is a learning process for me to create content that people may actually want to read (and follow), including the process of making it presentable and keeping a consistent update schedule. I also want to put my interest in cooking to good use, especially working through a variety of recipes to keep me learning. Overall, I want the experience of being able to creatively show the process of how I make all of my garlic recipes. While I know that I'm not a professional at this stuff, I at least like what I cook, and who knows - maybe someone can get ideas from how I do something. Or maybe promote discussion!


So again, hello all! I'm Katie Sweitzer, garlic fanatic, and I hope you enjoy this garlicky, blogging experience with me!